.png?width=2240&name=Austin%20Ads%20(9).png) This is Part 2 of a 4-part series on Blind Rivets
This is Part 2 of a 4-part series on Blind Rivets
In part one of our series on blind rivets, we briefly looked at the history of the blind (a.k.a. pop) rivet and discussed the two most important considerations to maximize joint integrity when using them: Grip Range and Hole Size. If you have not yet read that post, click HERE.
We'll now break down the third and fourth most important aspects to consider to maximize joint integrity using blind rivets: Material and Installation Tooling.
- Material - A good rule of thumb when selecting a blind rivet is to use the same material rivet as the substrate into which it's being installed. If you're riveting sheets of steel together, use a steel rivet. The same goes for aluminum and stainless steel. This is important because using dissimilar metals may result in galvanic corrosion, depending on the application's
 environment.
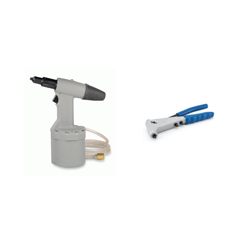
Installation Tooling - What role exactly does installation tooling play in how a blind rivet works? It's simple. An installation tool has one job … to pull the stem of the blind rivet up through the rivet body until the pull force of the tool overcomes the tensile strength of the rivet stem, resulting in the stem breaking off at its predetermined breakpoint.
There's nothing more to it than that. All strength parameters and application criteria of a properly installed blind rivet reside within the rivet itself. If the installation tool breaks off the blind rivet stem, it's done its job. So, this means that the primary consideration for blind rivet installation tooling is accessibility. Can the tool fit into the area around where the rivet needs to go? Fortunately, there are many different configurations and types of tooling available. So, in most cases, you'll find an installation tool that quite literally "fits" your needs.
The caveat to the accessibility requirement lies in the fact that certain types of blind structural rivets require special nose tips for the installation tool to install the rivet properly. That is not the case for non-structural blind rivets. We'll discuss structural rivets in more detail in part three of this series.
Now that we've discussed how to maximize joint integrity, we can turn our attention to the rivets themselves. There are four basic elements to each blind rivet (you'll note three of them speak directly to the joint integrity considerations as well).
 Rivet selection involves choosing:
-
-
- Material
- Diameter
- Grip Range
- Head Style
-
- A wide range of diameters and grip ranges are available, allowing blind rivets to be used in a large array of applications. While most common blind rivets are available in aluminum, steel, and stainless steel, they're also available in copper, brass, and plastic. These softer rivets have become more common with the increased use of composite materials.
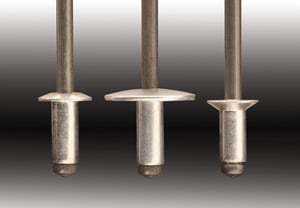
Selection of head style is not only important for the aesthetic of the finished piece, but also with consideration to the strength of the materials being joined. The three most commonly available head styles are Dome Head, Countersunk,  and Large Flange.
Dome head rivets are considered the most versatile and are used most frequently because of their low profile and smooth aesthetic appearance. Be aware that some manufacturers use the terms "button" head and "low-profile" head instead of dome head. Both button and low-profile heads are very similar to the standard dome head. Countersunk rivets are used when a flush surface is desired or required.
Different angles of countersunk heads are available. The most common style for standard countersunk blind rivets is 120-degree countersunk. 82-degree and 100-degree countersunk heads can also be found for some military spec and structural applications. Large flange blind rivets are typically used to help distribute the stress load when one of the mating materials is ductile, such as composites, wood, fiberglass, and plastics.
If you have any questions about using blind rivets in your application, contact your nearest Austin Hardware® location to discuss the options.


